
To take amazing night photos on your phone, start by stabilizing your device with a tripod or steady surface to prevent blur. Adjust your camera settings with a slower shutter speed, lower ISO, and manual focus to optimize low-light performance. Use night mode or long exposure features to capture more light and detail. Get creative with lighting and composition, and explore post-processing for that final professional touch. Keep experimenting, and you’ll reveal impressive night shots every time.
Key Takeaways
- Use a tripod or stable surface and remote shutter to prevent camera shake during long exposures.
- Enable night mode or manually adjust shutter speed, ISO, and focus for optimal low-light capture.
- Incorporate ambient light creatively, such as street lamps or neon signs, to add mood and depth.
- Experiment with different angles, reflections, and compositions to create unique and compelling images.
- Post-process photos to enhance contrast, reduce noise, and fine-tune brightness for stunning results.
Stabilize Your Phone for Sharp Night Shots
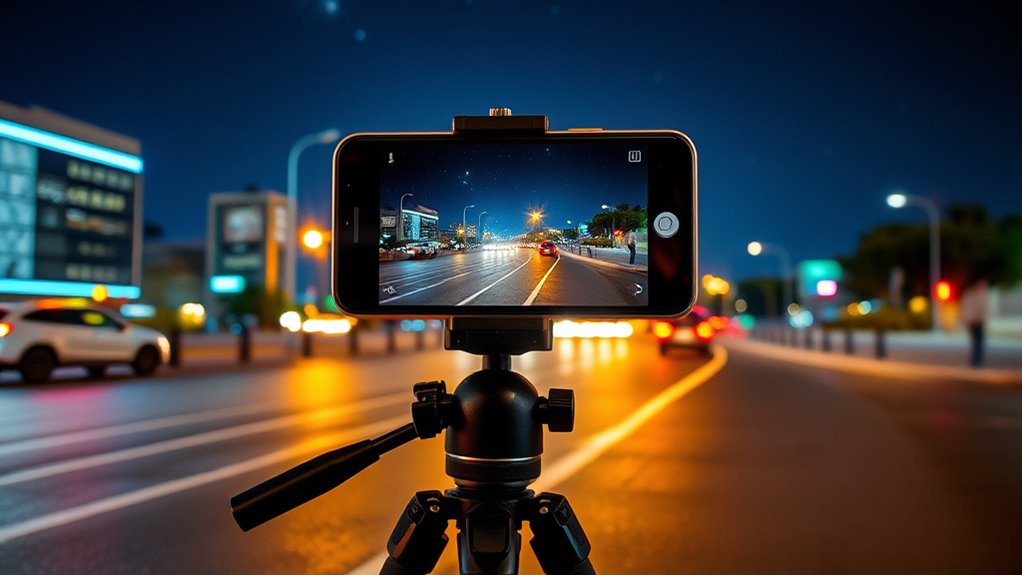
To capture sharp night photos, stabilizing your phone is essential because even slight camera shake can blur long exposures. You should always use a tripod or find a stable surface, like a ledge or table, to keep your phone steady. If a tripod isn’t available, resting your phone on a solid object helps minimize movement. Use a remote shutter release or the timer function to avoid pressing the shutter button, which can cause unwanted vibrations. Carrying a small flashlight can help you focus in low light and adjust your scene without touching your phone. For added stability, consider phone-specific accessories like stabilization mounts. These tools guarantee your phone remains still during long exposures, resulting in clearer, sharper night photos. Additionally, understanding your phone’s sensor quality can significantly impact the clarity of your night images.
Optimize Camera Settings for Low Light

Adjusting your camera settings can substantially improve night photos by maximizing light intake and minimizing noise. To get better results, consider these steps:
Maximize night photo quality by adjusting settings: slow shutter, low ISO, and focused white balance for clearer, brighter shots.
- Use slow shutter speeds to let in more light, but keep your phone steady.
- Set ISO as low as possible to reduce grain, increasing it only if the scene is too dark.
- Manually adjust white balance around 4300K to keep colors natural.
- Lock focus to prevent hunting during long exposures, avoiding blurry images.
- Utilize energy-efficient camera modes or apps designed for low-light photography to enhance image quality while conserving battery life.
Use Night Mode and Long Exposure Techniques

Night mode leverages your smartphone’s advanced sensors and software to capture brighter, clearer images in low-light conditions without extensive manual adjustments. When activated, it combines longer exposure times with noise reduction for better detail and color accuracy. You can manually adjust exposure times in some apps to control the light intake or experiment with different durations for creative effects, like light trails or silhouettes. Using a tripod or stable surface is essential to prevent blur during long exposures. Additionally, explore capturing motion by deliberately setting longer shutter speeds. Here’s a quick guide:
| Technique | Best Use | Tips |
|---|---|---|
| Night Mode | Low-light, static scenes | Hold steady, avoid touching screen |
| Long Exposure | Light trails, motion blur | Use tripod, manual shutter control |
| Light Trails | Moving lights, vehicles | Experiment with shutter speed |
| Silhouettes | Bright backgrounds, subjects in front | Position subject against light |
| Creative Effects | Artistic, mood-setting images | Adjust exposure and composition |
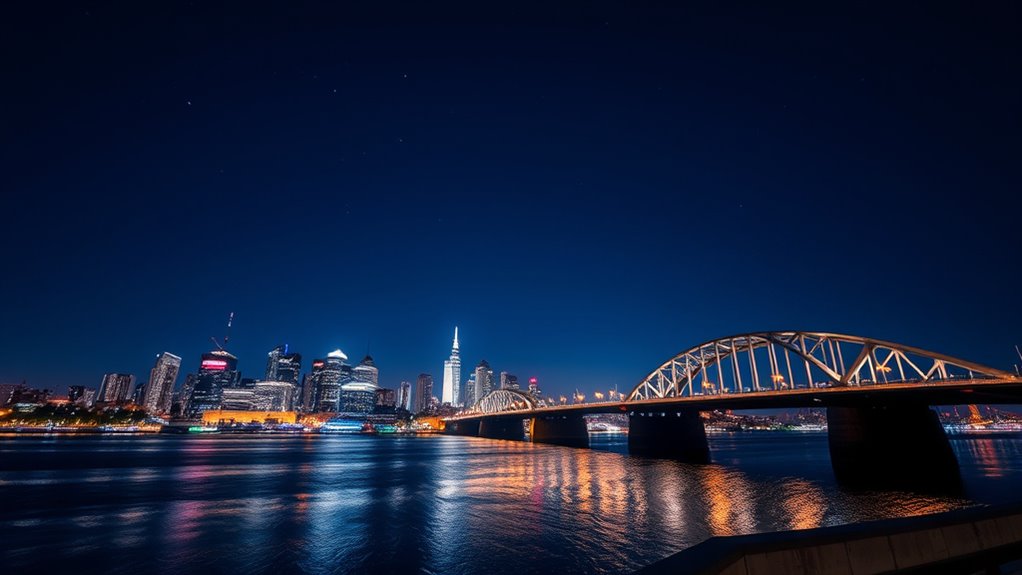
Master Composition and Creative Lighting

Mastering composition and creative lighting is essential for capturing stunning night photos that stand out. To improve your shots, focus on these key aspects:
- Choose your location wisely—look for spots away from city light pollution to capture stars or a clear night sky.
- Use ambient light creatively—utilize street lamps, neon signs, or fires to add warmth, contrast, and depth.
- Frame intentionally—incorporate natural light sources, play with angles, and consider cropping afterward to enhance your composition.
- Balance light and dark—compose your scene to emphasize contrast, highlighting details in shadows while controlling highlights for mood.
- Consider Free Floating techniques—using objects or subjects that appear to float can add a surreal or artistic effect to your night shots.
Enhance Photos With Post-Processing Magic

Once you’ve captured your night photos, the real magic begins with post-processing. Start by adjusting brightness and contrast to make details pop without losing the mood. Tweak highlights and shadows to balance light spots and dark areas, revealing more depth. Use noise reduction tools to smooth out grain from high ISO or long exposures, but be careful not to overdo it—preserve sharpness and texture. Enhance colors by increasing saturation or selectively boosting certain hues to emphasize city lights or natural tones. Apply local adjustments like graduated filters to sharpen specific areas or add clarity to the scene. Understanding passive voice can help you craft clearer, more direct instructions for editing your photos. Finally, crop or straighten your image to improve composition. Export in high-quality formats to guarantee your stunning night shot remains vibrant and detailed.
Explore Practical Tips for Clearer Photos
To get clearer night photos, you should keep your camera steady using a tripod or stable surface, which prevents blur during long exposures. Make sure to activate night mode and manually adjust your camera settings—such as shutter speed and ISO—to optimize light capture and reduce noise. Managing these elements carefully will help you achieve sharper, more vibrant night shots. Additionally, creating calm and organized homes by setting up your equipment beforehand can help you focus on capturing the perfect shot without unnecessary stress.
Steady Your Shot
Ensuring your camera remains steady is essential for capturing sharp night photos, as even the slightest movement can cause blurring. To maximize stability, try these tips:
- Use a tripod or place your phone on a stable surface to prevent hand shake during long exposures.
- Activate the timer or use a remote shutter to avoid jitter when pressing the button.
- Carry a flashlight to help focus or illuminate dark areas without touching the phone.
- Consider phone accessories like stabilization mounts or clip-on tripods for extra steadiness.
- Be aware that camera stability plays a crucial role in low-light photography, and employing these techniques can significantly improve your results.
These methods reduce vibrations and help you achieve crisp, clear images in low-light conditions. Remember, stability is key to capturing the details and mood of night scenes effectively.
Use Night Mode
Night Mode leverages your smartphone’s advanced hardware and software to produce brighter, clearer images in low-light conditions. When you activate Night Mode, your phone combines multiple shots into one, reducing noise and enhancing detail. To get the best results, hold your phone steady or use a tripod, as the mode often uses longer exposure times. Tap to focus on your subject, then let Night Mode work its magic—avoid pressing the shutter button hard to prevent shake. If your phone allows, manually adjust the exposure time for brighter or moodier photos. Keep in mind, Night Mode is optimized for static scenes; moving subjects may appear blurred. By using this feature wisely, you’ll capture stunning, vibrant night photos with minimal effort. Additionally, understanding how your phone’s modern camera technology works can help you optimize settings for even better results.
Manage Exposure Settings
Managing exposure settings is crucial for capturing sharp, well-lit night photos. Proper control helps prevent overexposure or underexposure, ensuring your images are clear and detailed. Here are practical tips to optimize exposure:
- Use slow shutter speeds to gather more light, but keep your phone steady.
- Set ISO to the lowest possible value to reduce noise, adjusting slightly higher if needed.
- Manually lock focus to avoid hunting during long exposures, which can cause blurriness.
- Underexpose slightly in scenes with bright lights to preserve highlights and prevent blown-out areas.
- Be aware of camera sensor limitations to better understand how your phone handles low-light conditions.
Experiment with these settings to find the perfect balance for your scene. Combine manual adjustments with stabilization techniques for sharper, more professional-looking night photos.
Experiment With Different Night Scenes and Effects

Experimenting with different night scenes opens up a world of creative possibilities that can elevate your photography. Try capturing starry skies or the Milky Way in dark, clear areas away from city lights for stunning celestial shots. Use light trails from moving vehicles to create dynamic effects by employing long exposures. Play with silhouettes by positioning subjects against bright backgrounds like streetlights or neon signs for dramatic contrast. Experiment with urban scenes, capturing reflections in puddles or glass to add depth. Don’t hesitate to try different angles, such as low or high perspectives, to add interest. Incorporate ambient light sources creatively—use shadows, side lighting, or backlighting to sculpt your images. These variations will help you develop a unique style and discover new visual stories.
Frequently Asked Questions
Can I Take Good Night Photos Without a Tripod?
Yes, you can take good night photos without a tripod by stabilizing your phone against a sturdy surface like a wall or bench. Use a timer or remote shutter to prevent shake, and avoid pressing the shutter button directly. Keep your hands steady, breathe evenly, and choose scenes with good ambient light. Activate Night Mode and manually adjust settings if possible for sharper, clearer images.
What Smartphone Features Are Essential for Night Photography?
You need a smartphone with a good low-light sensor, preferably with Night Mode capabilities, to capture clear night photos. Look for features like optical image stabilization, manual controls in Pro Mode, and a wide aperture lens to let in more light. A phone with advanced software processing, such as noise reduction and HDR, helps improve your images. These features ensure sharper, brighter, and more detailed night shots.
How Do I Prevent Noise in My Low-Light Night Shots?
To prevent noise in your low-light night shots, keep your ISO as low as possible, adjusting only if needed for brightness. Use a tripod or stable surface to avoid camera shake, which allows for longer exposures at lower ISO. Enable night mode or manual settings to optimize sensor performance, and consider post-processing noise reduction tools. Proper stabilization and exposure control help you achieve clearer, sharper images with minimal grain.
Is It Possible to Shoot Star Trails With a Phone?
Yes, you can shoot star trails with your phone. Use a tripod or stable surface, and activate your phone’s long exposure mode or Night Mode if available. Set the exposure time to the maximum, typically 15-30 seconds, and take multiple shots in a row. Use a remote shutter or timer to avoid shake. Later, stack the images with editing software to create smooth star trail effects.
How Do I Capture Sharp Night Portraits With Limited Equipment?
Capturing sharp night portraits is like catching fireflies in a jar—delicate but rewarding. You should stabilize your phone on a sturdy surface or use a tripod, and activate Night Mode for longer exposures. Lock focus manually to prevent hunting, and keep ISO low to minimize noise. Use the timer or remote shutter, and position your subject against interesting backgrounds or light sources for striking contrast. With patience, you’ll get crisp, enthralling images.
Conclusion
Don’t let low light hold you back—your phone has all the tools you need to capture stunning night photos. Even if your shots seem blurry or dark at first, experimenting with stabilization, settings, and lighting can make a huge difference. Remember, practice makes perfect, so keep trying different scenes and techniques. With patience and a little creativity, you’ll be amazed at how beautiful your night photos can become, no fancy equipment required.